|
|
Moving around in the document. - such a deceptively simple, but essential subject that deserves a chapter of its own. At any given time, the drawing area shows some part of the drawing. If it were not so confusing, you could say it is a window to the drawing. Technically, it is called a ’pane’ as in a window pane. By moving this pane and/or the document visible through the pane is how you bring various parts of the document into view, and therefore it is also customary to call it a ’view’.
As drawing and designing are mostly visual tasks, it is essential to be able move around in the drawing to see what you are doing. That is why jDraft provides so many ways to do that and why it is essential to master at least some of them. You don’t need to use them all, but it’s essential that what you do use becomes a second nature so that moving around does not distract you from drawing.
Most of the View controls relate to a specific view (see below on multiple views in section 6.8.2) so the view controls are attached to the lower left corner of each view, see figure 6.1.
|
|
You popup the View -menu by clicking on the small arrow.
One of the most useful view controls is the Mouse Wheel, especially in laptops that have a touch pad and support two-finger drag gestures, like in Mac OS X. Rolling the wheel causes the view to be centered at the current mouse location and be zoomed in/out with small amount for each wheel increment. This makes it very easy and fast to both move around and zoom in/out. Just move to cursor to the location in your drawing that you are interested and roll the wheel (or gesture with two fingers). Small scrolls/gestures effectively just move your point of interest to the center of the screen while larger scroll wheel movements enables you to zoom in/out.
The good old scrollbars on the right and bottom of the pane move the ’window’ over the document. You scroll by dragging the knob (a.k.a thumb) around. You can also scroll by small increments by clicking at the small arrows. By clicking the ’track’ on which the knobs slides, you can scroll half screen fulls at a time. The size of the knob relative to the size of the track gives an indication on how much of the document is visible at the moment. Think like pane size = knob size and track size = document size.
Should be familiar concept from myriads of other appications.
Because there are so many ways to move around, sometimes a single mouse gesture moves your view to somewhere totally wrong, from which it can take a lot of navigation to find your way back. This can be really frustrating and may interrupt your thought/drafting process. For this reason jDraft remembers the last ten view positions for each pane so you can move back and forth between these view position with these buttons.
This button resizes and repositions the pane (or document, depending on your view point, pun intended) so that the whole drawing is visible. This is handy if you get totally lost - it is a sort of ’reset’ button.
These buttons make the document (or pane depending on your view point, pun intended) larger or smaller. The icon with the plus sign makes the document larger, as if you are moving the document closer to you. This is known as Zoom In. The other one is, of course, called Zoom Out and makes the document appear smaller, showing more of it.
This button activates the Zoom Command. Clicking this button once activates the command into a so called one-shot mode in which, after zooming once, the current drawing command is resumed. This makes it handy to quickly zoom in (or out for that matter) while drawing something, without interrupting your drawing command. Double clicking activates the Zoom Command so that it remains in effect until another command is selected or the Zoom Command button is clicked once more. You can also activate/deactivate this command by pressing the ’Z’ key (without any modifier keys). Pressing ’Z’ toggles between the Zoom Command and your current drawing command. When the Zoom Command is active the cursor takes one of the following shapes:
The Zoom In (plus sign) is the default and is active unless you press the ALT-key on the keyboard, in which case the Zoom Out (minus sign) mode is in effect as long as the alt key is held down. Clicking with the mouse zooms in/out by a factor of 1.41 effectively doubling or halving the visible area of the document and centering the view at the click location.
If you click and drag with the zoom command to specify a rectangle the view is resized and repositioned so that the area of the rectangle fills the view. Note that you can activate this same Zoom Command click and/or drag feature at any time with center mouse button.
If the SHIFT-key is held down, the cursors turns into a hand shape. In this mode you can grab and move the document by dragging it with the mouse. You can also at any time center the view at the mouse location without pressing any of the mouse keys - just press the key ’Q’.
This menu contains lots of less frequently used view control commands, most important of which is rotating the view. More on this later in Advanced view options.
A feature often not seen in simpler drawing programs is the ability to rotate the document in relation to the view. In engineering drawing this is not a very often required feature but in architectual applications the need sometimes arises, as two wings of a building may be at odd angles to each other, making working on at least one of the wings less than optimal, as illustrated in figure ??
|
|
Working with features that are not aligned with the document side becomes easy if you rotate the view to align it with the feature being drawn an create a coordinate system to match,
Rotation can be specified numerically with the view menu command ’Set View...’ More often, though, the actual view angle may not be known precisely - instead it is the result of geometric construction or some such. In these case the easiest way to align the view is to select a line that you want to be horizontal or vertical in the view and use the ’Align With Selection’ command followed with ’Rotate 90’ / ’Rotate 180’ commands from the view menu, until the desired orientation is achieved.
It is also possible to align the view with the current User Coordinate System (UCS).
Very often in large drawings it becomes necessary to draw lines or other features from one end to the other. To snap accurately you need to zoom in on both ends in turn, which can be a burden if many such lines are required. For this purpose any view can be split into two views, either horizontally or vertically, as illustrated in figure ?? Now both views can be independently zoomed in on different locations on the document, and drawing can be carried out by clicking on the view that provides the best visibility.
|
|
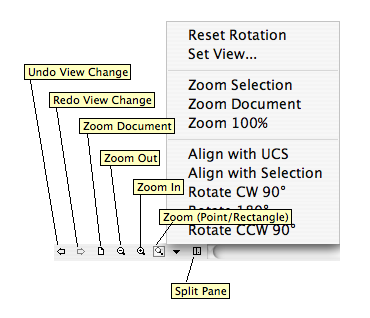 Figure 6.1: View Controls
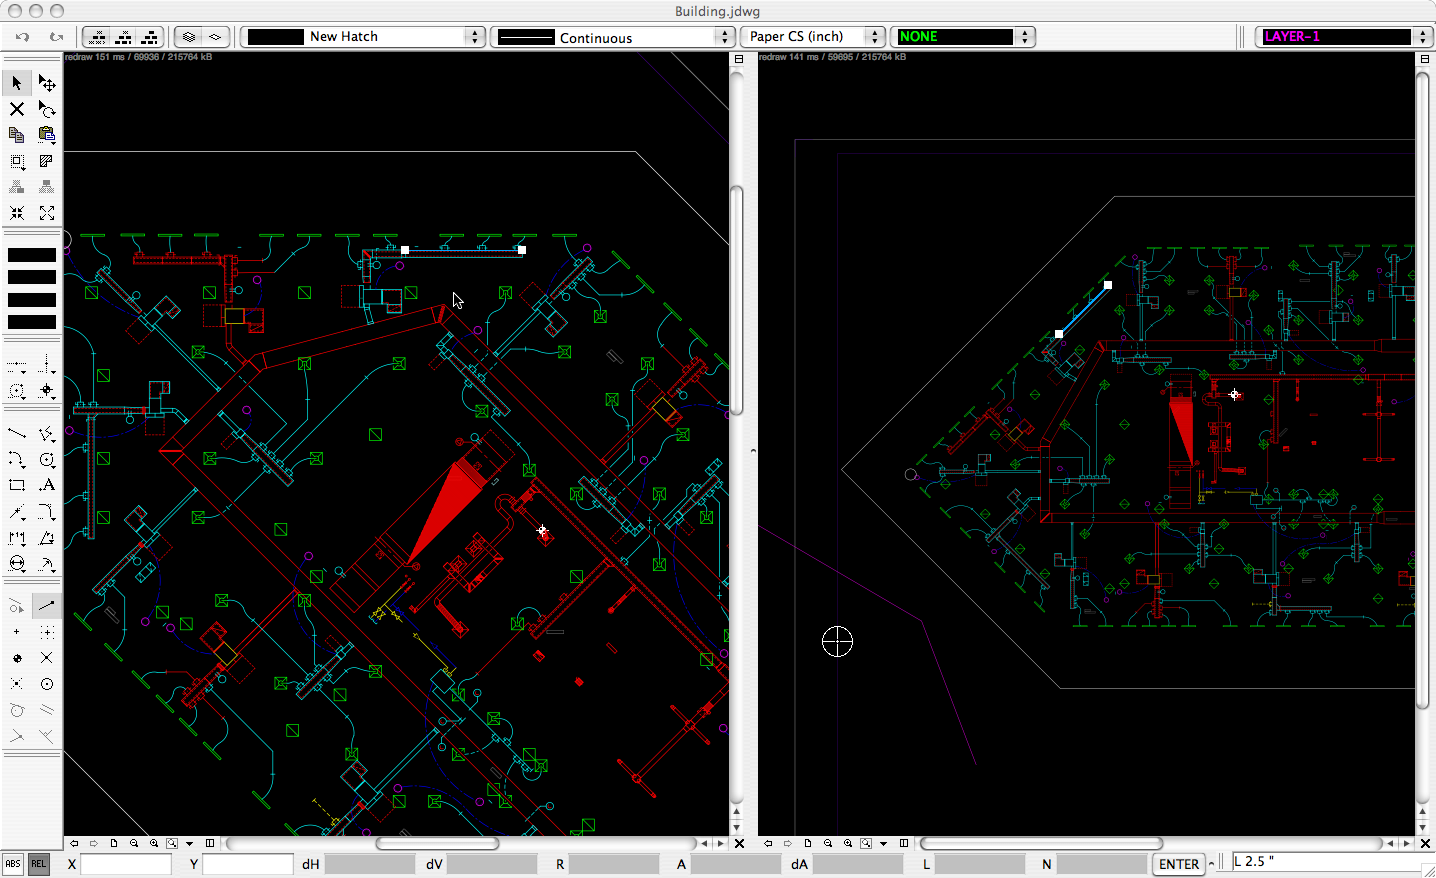 Figure 6.2: Rotated Views
 Figure 6.3: Multiple Views